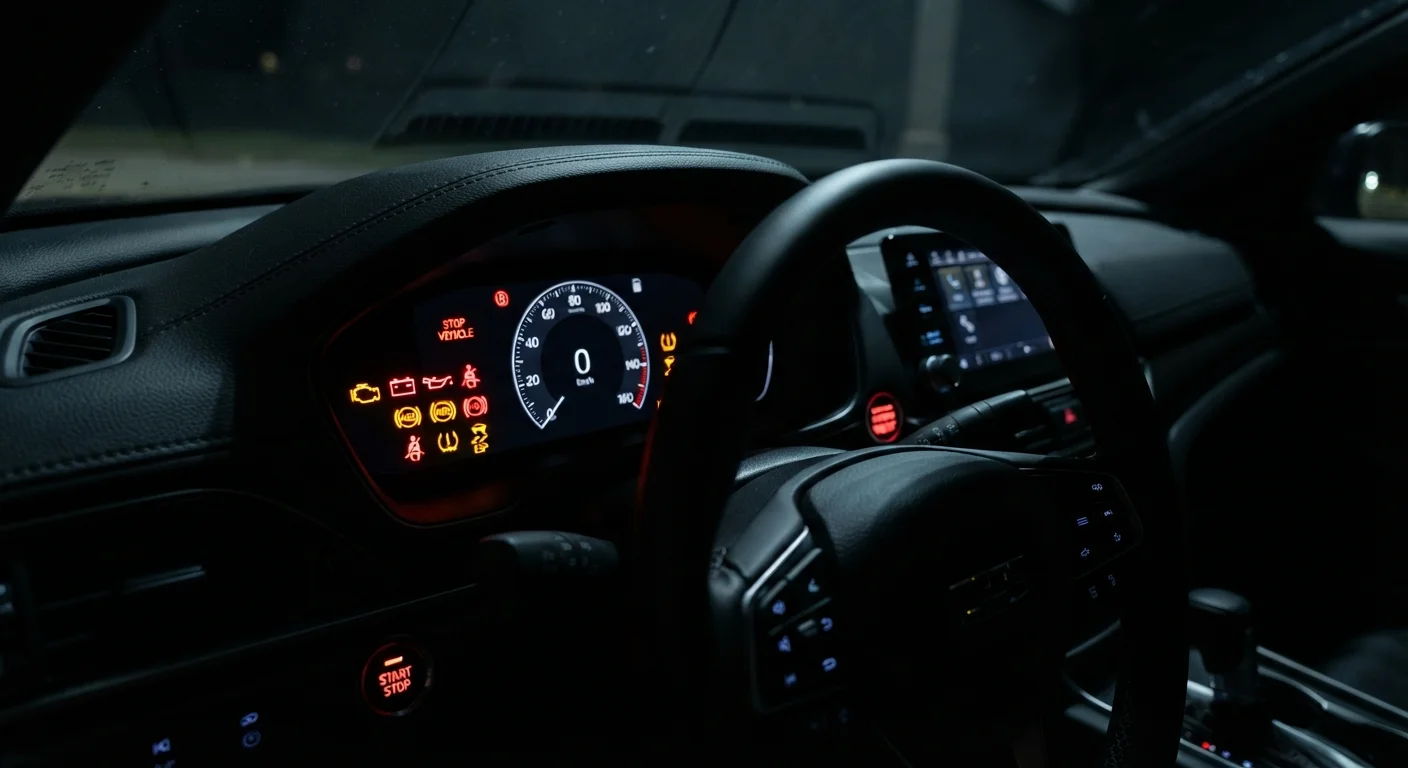
Why Warning Lights Exist
Every modern vehicle is equipped with an onboard diagnostics system (OBD) that continuously monitors dozens of sensors throughout the car. When something falls outside normal operating parameters, the system triggers a warning light on your instrument cluster - the panel directly behind your steering wheel. Think of these lights as your car's way of flagging a concern before it becomes a breakdown.
Not all lights carry the same urgency. A red light almost always demands immediate attention and may mean you should pull over safely and stop driving. An amber or orange light typically signals a developing issue that needs attention soon but not necessarily right now. A green or blue light is simply informational - it tells you a system is active.
Ignoring dashboard lights is one of the habits that quietly shorten a car's lifespan, so learning what each symbol means is a genuinely worthwhile investment of time.
| Warning light colors | Red = urgent, Amber/Orange = attention soon, Green/Blue = informational |
| First step when any light appears | Check your owner's manual for the vehicle-specific meaning |
| Flashing vs. steady check engine light | Flashing = active fault, reduce speed and seek immediate inspection; steady = schedule a diagnostic scan |
| Oil pressure: safe to drive? | No - pull over and switch off the engine immediately |
| TPMS trigger threshold | Typically 25% below the recommended tyre pressure (U.S. NHTSA regulations (FMVSS No. 138)) |
The Most Common Warning Lights Decoded
Below are the warning lights new drivers encounter most often, along with what each one is really telling you.
OBD (Onboard Diagnostics)
A standardized computer system built into modern vehicles that monitors engine and emissions-related components. When a sensor reading falls outside acceptable limits, OBD stores a fault code and illuminates a warning light.
Instrument Cluster
The panel of gauges, dials, and warning lights positioned directly behind the steering wheel. It displays key vehicle data such as speed, fuel level, and any active warning indicators.
Catalytic Converter
An exhaust system component that reduces harmful emissions by converting pollutants into less harmful gases. It is expensive to replace and can be damaged by engine misfires or running a vehicle with certain unresolved faults.
TPMS (Tyre Pressure Monitoring System)
A sensor-based system that tracks the air pressure inside each tyre and alerts the driver via a dashboard light when pressure drops below a safe threshold.
Alternator
A generator driven by the engine that recharges the battery and powers the vehicle's electrical systems while the engine is running. A failing alternator is a common cause of the battery warning light.
Engine Warning Light (Check Engine)
This amber symbol - typically an engine outline - is one of the most misunderstood lights on the dashboard. It can mean anything from a loose fuel cap to a misfiring cylinder. If it appears steady, schedule a diagnostic scan at a qualified garage. If it flashes, reduce your speed and have the vehicle inspected as soon as possible, as a flashing light often indicates an active misfire that could damage your catalytic converter.
Oil Pressure Warning
A red oil can symbol means your engine's oil pressure has dropped to a dangerous level. Pull over safely and switch off the engine. Check the oil level using the dipstick; if it's low, top up with the correct grade specified in your owner's manual before driving further. Continuing to drive with low oil pressure can cause severe, often irreparable engine damage.
Battery / Charging System
A red battery symbol suggests the electrical charging system isn't functioning properly - this could be the alternator, battery, or a wiring fault. Minimize electrical load (turn off the air conditioning, heated seats, etc.) and drive directly to a workshop. The car may only have minutes of battery reserve remaining.
Brake System Warning
If a red exclamation mark or the word BRAKE appears, first check that your parking brake is fully released. If it is and the light stays on, your brake fluid may be low or there could be a fault in the braking circuit. Do not continue driving - have the vehicle inspected immediately. For a deeper look at brake symptoms, see our guide to brake wear and what the signs mean.
Tyre Pressure Monitoring System (TPMS)
An amber symbol resembling a flat tyre with an exclamation mark indicates that one or more tyres has fallen below the recommended pressure. Check all four tyres (and your spare if applicable) with a pressure gauge and inflate to the levels listed in your door jamb sticker or owner's manual. Driving on under-inflated tyres affects handling, fuel economy, and tyre lifespan.
Temperature Warning
A red thermometer symbol means your engine coolant has reached a dangerously high temperature. Pull over safely, switch off the engine, and do not open the bonnet immediately - pressurized steam can cause serious burns. Allow the engine to cool for at least 30 minutes before checking the coolant reservoir level.
When to Drive On vs. Stop Immediately
A simple rule of thumb: red means stop, amber means schedule. Any red warning light warrants pulling over as soon as it is safe to do so. Amber lights generally allow you to complete your journey and book a workshop appointment, but you should not delay beyond a few days.
Your Owner's Manual Is the Definitive Guide
While the symbols described here are widely standardized, manufacturers occasionally use proprietary icons or assign slightly different meanings to common lights. Your vehicle's owner's manual contains a dedicated warning light reference section specific to your make, model, and year. Keep it in the glove compartment and consult it whenever an unfamiliar light appears. Many manufacturers also make digital versions available through their websites.
When a warning light appears, note whether it is steady or flashing, record the symbol's color and shape, and consult your owner's manual for the vehicle-specific meaning. Different manufacturers use slightly different icons, so your manual is always the definitive reference.
If you're ever uncertain whether a task requires a professional or you can handle it yourself, our overview of DIY checks vs. garage visits can help you decide confidently.